Step by Step Guide: Aesthetic iOS 14 Home Screen Customization
Hi there, lovelies! I’m back with a tutorial for those who have an iPhone and want to customize their new iOS 14 Home Screen.
If you are having problems trying to figure out how to do this, then this post will help you with that.
If you are having problems trying to figure out how to customize your iOS 14 home screen, then this post will help you with that! Click To TweetI’ll let you know how to find icons for your apps, how to install them, how to add photos, notes, etc; and at the end, I’ll give you some customization inspo.

I have seen so many beautiful iPhone customizations that inspired me to do mine as well.
It was a real struggle at first because I didn’t know where to start and it was a little confusing.
In general, my recommendation to start customizing your iOS 14 home screen, is to pick a theme. To do that, firstly pick a phone wallpaper.
Once you choose a phone wallpaper you love, you can start creating from there. That will help you to find a color palette and the style you want to achieve.
Another thing that was hard for me was creating a layout to display my widgets and apps. So before doing any change I would play around with the widgets and think about how you want to organize your phone.
After trying a few layouts, I decided that I wanted each page to be a different category.
The main page displays all my go-to apps. Those that I constantly use and that I need fast access to.
I have the Mail app, Notes, Spotify, Photos, all my banking apps, social media apps, Books, and the game I’m currently playing.
I also added a calendar because I like to see the days of the month to plan content or just to plan my week.
On the second page, I wanted all my apps related to blogging, so they all would be together. Like photo editing apps, Goggle Analytics, OneNote (which I use to plan all my content), etc.
That was a little summary of what I did to my new iOS 14 home screen. Now, I’ll explain you step by step what I did to achieve that look.
1. Choose A Background + Color Palette
My go-to place to find iPhone wallpapers is Pinterest. If you want to be even more unique, you can definitely make your own.
I recommend trying a few options before settling to one. Why? Because once you start moving the apps and adding widgets, you might not like how a certain wallpaper looks.
While it’s important to find one you like it’s also not something you want to focus on (I spent way too much time on this).
Sometime choosing a solid color can be a good option as well! To get a solid-color wallpaper, you can use the PicArt app.
Or you can look for one on Pinterest. You can write, for example, ‘pink color’; and many options will show up.
Once you select the wallpaper you want to use, we can choose a color palette for your home screen theme.
To do that, you can go to the Instagram app and do as if you want to add a Story. Then select your background picture from your camera roll.


Once you add the wallpaper from you camera roll, click on the option to draw on the photo (at the top right).
To get your color palette in one picture; first, paint an area of your wallpaper in a different color.
Secondly, use the color picker tool at the botton left of your screen to select the main colors of your wallpaper. Just like you see on the picture below.


Save that photo and you are set!
While selecting you color palette is not that important, is good to know which colors to use when you create your iPhone home screen theme.
It gets more relevant when you create the icons for the different apps on your phone.
2. Empty Your Home Screen
Before you updated your iPhone, you might have all your apps in different folders. Don’t delete them yet!
The apps that show on your iOS 14 home screen are now “copies” from the original ones.
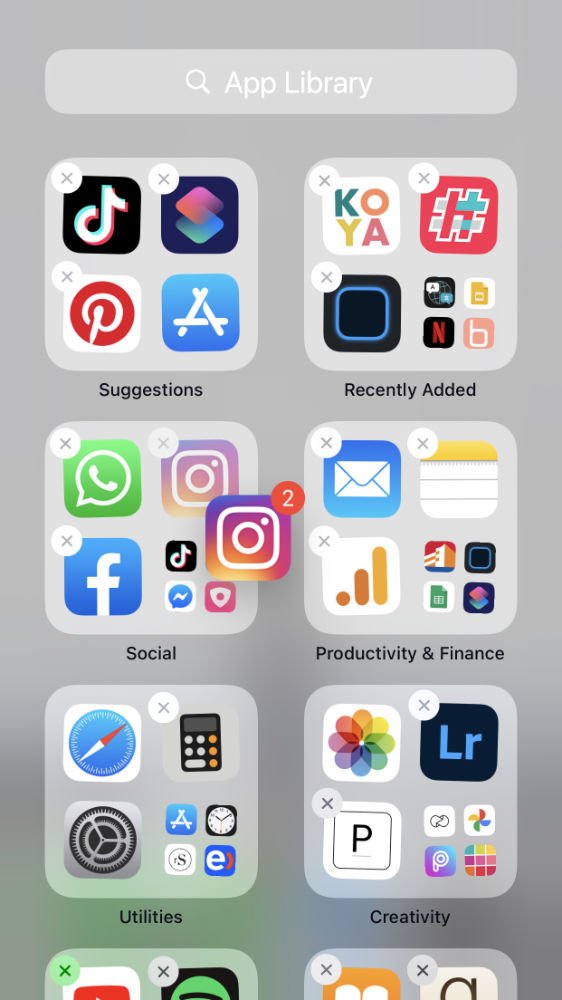
When you tap on a particular app for a few seconds, an option to ‘Remove App’ will appear. If you click on it, three options will show. One of those options is ‘Move to App Library’.


This App Library storages all your apps.
This option allows you to delete from your home screen those apps you don’t use on a daily basis. A great way to declutter our home screens if you ask me!
To find the App Library, you just need to swipe left until you reach the end.
I mention this because you probably spent hours organizing them, and I don’t want you to mess with them while you organize your new home screen.
Also, once you remove apps from your home screen, these will go to different folders on the App Library. You can’t edit these folders.
If you want to add an app to you Home Screen, then you can tap on the app for a few seconds until you can move it. That will allow you to add the app wherever you want.

So instead; what I recommend doing is, hiding the page with all the apps with all your organized folders. That way you still have them all in one place and everything is the way you like it (incase you change or mind).
To hide a page, just hold your finger on the screen (until the apps start moving), then click on the dots that are “highlighted” at the bottom.
When you do that all the pages will appear. You can select and unselect the pages you want to display or hide.


Side-note: For the sake of the example, I changed my background for a bit. It was so white that I couldn’t show what I was trying to explain.
As you can see the three first pages are checked, while the forth page is unchecked. Which means is hidden!
The page I unchecked have apps and folder I didn’t want to touch or move. It was nice to have this option!
So now that we clarified that, we can start moving (or simply hiding) all those folders and apps to a different page until your primary home screen is empty. Just like a brand new canvas.
3. Start Creating Your iOS 14 Home Screen Layout
Now is time to start adding the apps and widgets to your Home Screen.
Depending on what you want, you can organize your new iOS 14 Home Screen in different ways.
In my case, my priority was to have an easy access to all the apps that I use on a daily basis. So most of my social media apps, everything related to banking, the mail app, Notes, Spotify, the game I love to play and my Books apps.
I also wanted to have the option to see the calendar with all the days of the month. I always look at it when I plan my content or when I plan things ahead. It was a must for me!
To add a widget you just have to tap the screen and hold for a few seconds until the apps start moving. Then on the top right you will a ‘+’ sign. Click there and you will have access to all the widgets.
I don’t use the calendar app that much since I’m more a paper planner kind of girl. So when I added the Calendar widget, it looked kinda weird on the left side because I didn’t have an event to display.
So I solved that problem by displaying a short quote or message. That way I would see it every day when I look at my phone.
To do this, you need to add a new event and enable the option: all-day. You also need to set up the ‘Repeat’ feature, that way it will always display.
Make sure to choose a short quote or message. Otherwise it won’t fully display. Mine says “let go and trust” in Spanish. Which is a special quote that people use in Ho’oponopono.

The Calendar widget that comes with the new iOS 14 is cute and goes perfectly with my aesthetic, so I didn’t have to use a different app to customize it.
Sadly, the widgets that Apple offers aren’t customizable (you can’t change the colors, fonts, etc). In that case you can use an app that’s called: Widgetsmith.
You can go ahead and download the app right now, but we will use it again in a sec. For now, I just want you to focus on creating a nice layout. That way you can replace the iOS 14 widgets with the ones that Widgetsmith offers.
After deciding how I wanted the main page to look, I thought about what to do with the rest of the apps that I didn’t use that much.
Since I’m a blogger, I have many apps that are related to that. So I designed a whole page for those apps.
I also added a Reminders app widget to display all the upcoming posts on the blog.
Since I have so many apps related to photo editing, I just created a folder to have them all in the same place. I did the same with my productivity related apps like: Google Sheets, One Note (that I use to plan my content), and Drive (where I storage all my freebies and products).
I also added a photo widget (with Widgetsmith) to display a quote.

Finally, I have my motivation/Law of Attraction/Manifestation page.
Here I wanted to display those apps or links that I constantly use that related to that topic.
I also added a bookmark to my favorite morning meditation, that way I have an easy access to it.
Since this app is all about manifesting and inspiration, it was important for me to add quotes that speak to me.
You can even add a visualization board! I added both examples below.
- RELATED: How To Manifest With A Treasure Map


To create a visualization board you can use PicsArt or Canva! Remember that it has to be a square image to fit in the widget.
Once you have your layout ready, we can move to the next step!
4. Create Your App Icons
This step is optional, and it will depend on how much you like the Shortcuts option.
Why I say this? Because once you add a shortcut, it takes a few seconds to open the actual app, and it can be a little annoying.
Yes, it can help your phone look aesthetically pleasant, but also, your phone should be helping you in your daily tasks.
For example, if you make a Shortcut to make a call, sometimes that few seconds are important if you are having an emergency.
So I decided to use it only with a few apps.
Also, have in mind that once you add a shortcut you won’t be able to see the notifications, you might have to open it constantly to see; for example, if you have any new emails.
That being said, let’s start!
First, decide which apps you want to give a makeover. Secondly, create your app icons.
There are many ways to do this, but I can give you two options: 1) You can either search on Pinterest for free Instagram Story covers (they have many icon options). Or 2) use an app like PicsArt to create them.
I used a combination of both.
It will all depend on the aesthetic you want to achieve. Some people just add related pictures that goes with their color palettes, instead of looking for an icon that is related to the app.
If you decide to create your own app icons using PicsArt, now is when your wallpaper photo with the color palette you created on Instagram comes in handy.
That will help you to created the background for your app icons.
To do this go to Instagram < select the photo with the color palette on the Story section < choose one of the colors you want to use with the color picker tool < tap and hold on the screen for 1-3 seconds until the screen is filled.
Then save it, and repeat the process to have all the app icon backgrounds that you will need.


With that background you can go to PicsArt and add a sticker form the ones the app offers or you can an icon from a website like flaticon.com. With that website you can even change the color of the icons!
Remember that once you add the background to PicsArt, use the Crop tool to make it square.


Like I said, you can also use Flaticon to download icons with the colors you want. Follow the same steps as the photos above, but instead of adding a sticker, you add a photo.
To change the color of the icon, just click on that pencil you see on the left.


5. Create Shortcuts For Your Apps
Time to edit those app icons! Once you have ready all the app icons you want to use, you need to go to the Shortcuts app. If you deleted it, you can always download it again.
Open the Shortcuts app < click on the + sign you will find at the top right of your screen < then click Add Action < select the Scripting option < click on Open App < click on Choose < select the app you want to edit < click on the three dots at the top right < name your shortcut < click on Add to Home Screen < add the Home Screen name < tap the icon image < select Choose Photo and find the one you want to use < click on Add < then click Done < and click Done again.
Yes, it is kinda a long process; but once you learn how to do it, you can get all the apps done in less than 5 minutes.
So now that your apps have a new look, it’s time to replace the old ones.
To get rid of the original apps, tap the app and hold. Click on ‘Remove App’, then on ‘Move to App Library’.
Once you do that, you can place the shortcut on the place the original app was.
6. Add Widgets
Now that you have your layout ready, it’s time to customize your widgets! Like I mentioned, iOS 14 widgets aren’t customizable, so if you want them to look a certain way you need to use an app like Widgetsmith.
After you download the app, open it and start creating the widgets you want to use.
You have three different sizes to create your widget (small, medium, and large) and each size will have a different look. For example, the calendar widget has a different look depending on the size.


So now I’ll explain you how to add and customize certain widget. It’s easy but it can take some time to get used to the process.
Open the Widgetsmith app. Then choose which size of widget you want to add to you Home Screen. You can click on the widget it’s already there and edit that one, or you can click on ‘Add Widget’.
In this example I will show you how to create a medium widget, but the process is the same with all the sizes.
How To Customize A Widget
After clicking on the widget, another page will open (this will show you how the widget looks). Click on the widget, and all the options will show up. If you scroll up or down, more widget options will appear.
In this case I will show you how to customize the calendar widget.


Choose the calendar widget that you like the most < then click on the ‘Font’ sections and choose the one you like the most < then click on ‘Tint Color’ (the color of the font) < then click on ‘Background Color’ and choose the one that goes with your aesthetic.
If you keep scrolling down, you will have the option to add a border color!


Once you have it ready, go back to the menu by clicking the name of the widget at the top left. That will show you how your widget will look after all the changes.
You can change the name of the widget that way you can easily identify it. Then click Save.


How To Add Widget To Home Screen
I recommend creating all the widgets first then, adding them to your home screen. I think that is faster.
To add the widget to your home screen you have to tap on the screen and hold until all the apps start moving < then click on the ‘+’ sign on the top right < a page will open, so scroll down until the end where you will find the ‘Widgetsmith’ app < click there and choose the widget size (in this case medium) < hit on ‘Add Widget’


When the widget is added to your Home Screen, click on it again. A new page will open, then you need to click on the name of the widget (this can vary) to choose the one you want to add.


Now you can place it whenever you want!
Repeat the process with all the widgets you want to add to your new iOS 14 Home Screen.
Final Result
Even though I kinda showed my whole home screen already, I wanted a place to show you the final result.


So tell me, did you already customize your home screen? Or you are still looking some inspo to create your own? Let me know in the comments!
Also, I love looking at what other have done to their phones. So you can send me a DM on Instagram with the screenshots of your home screen. I would love to see them!
Sincerely,

Ok, this is seriously sooo helpful!! I haven’t done this yet because I really wasn’t looking forward to taking that time and effort, but this makes me feel like I can totally tackle it. Thanks for sharing!
Yeah, it can definitely take some time to decide how we want our phone to look, but after everything is done. It’s so worth it! I love the fast access from widgets.
Ahhh yes!! This was the tutorial that I needed! I was struggling trying to figure this out on my own! Your screen looks awesome!
It’s definitely a struggle to start customizing the new iOS14 Home Screen. But once it’s done, it’s super easy to make the changes.
This is such a great tutorial! I admit, I haven’t done any customization to my home screen since the new iOS came out. I need to get on that!
It’s definitely something fun to do! Especially when we can customize our iPhones with our favorite colors and photos.
What a great, in-depth tutorial! I’ve been meaning to share something like this because I spent a couple of hours working on my aesthetic home page the day I downloaded the update – and I love how it turned out. I definitely went full aesthetic and don’t have normal icons visible anywhere, but it’s made me so happy!
I LOVE how others go full into the customization! I wanted too but I don’t have the patience to wait for a few seconds for each app to open hahaha
I’m amazed at how in-depth this tutorial is! I would love to amp up my phone like this instead of using the normal phone pictures.
Kileen
cute & little
It definitely looks so cute! I love that we customize it. I hope Apple can improve the customizations and make it easier without using a third party app.
I usually just find any pictures that interest me. After reading this I should really put a little bit more creativity into it. Since I see my home screen every day.
Right? That’s a great motivation to do it! Since we are on out phone all day, they should represent out personality!
El oh el. This post reminds me that I am STILL using my phone’s generic background. I need to at least step up in that department. Doing so tonight! 🙂
hahaha At least adding some widgets! I love having easy access to my calendar and to-do list!